So, you want to stream video directly from your own server? This approach puts you in the driver's seat, giving you total control over everything from content quality to how it's delivered, all without relying on third-party platforms. Think of it as setting up your own private broadcast station, powered by your choice of software and protocols.
Understanding Your Video Streaming Workflow
Building a solid server-based streaming setup might sound intimidating, but it's really just a series of logical steps. You're essentially creating a pipeline for your video to travel from a source (like a live camera or a pre-recorded file) to your viewer's screen. Your server is the heart of this operation, handling all the heavy lifting of processing and distribution.
This simple infographic gives you a bird's-eye view of the entire process.
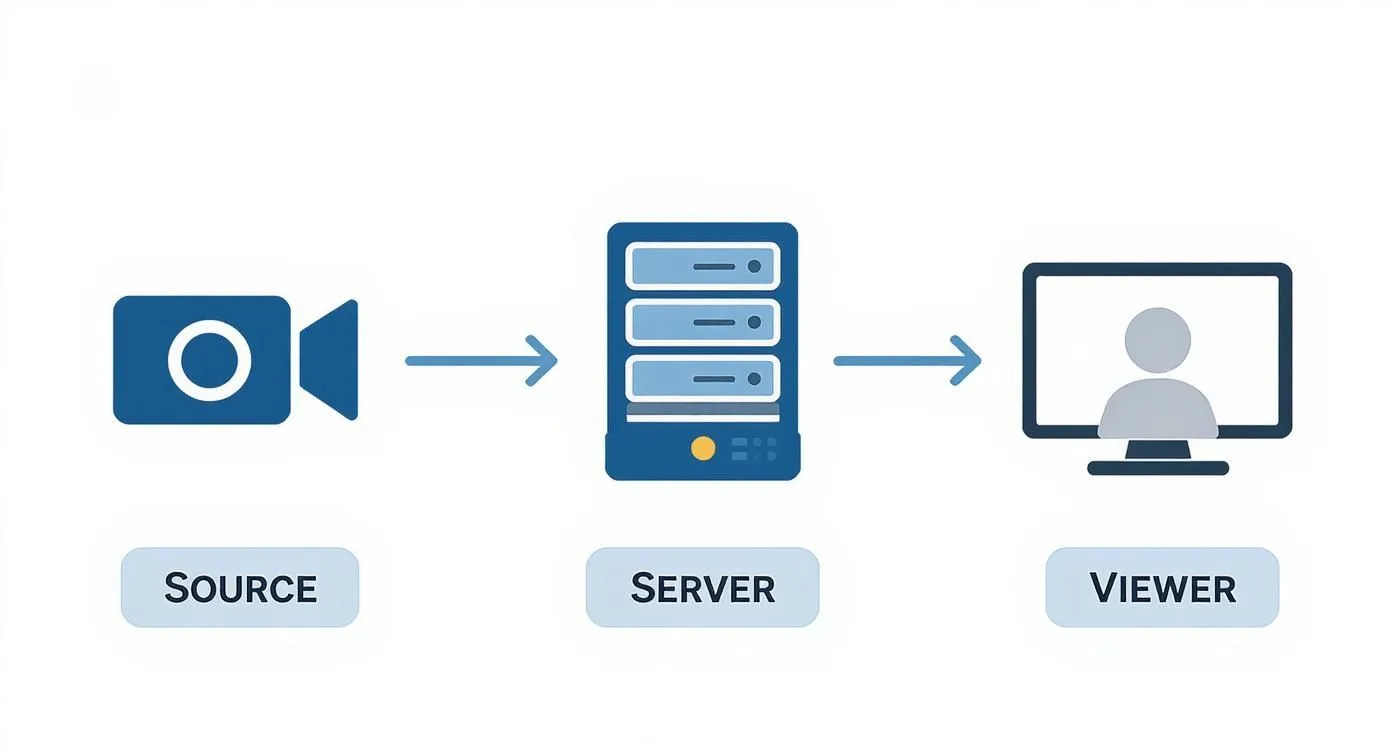
As you can see, the server is the engine that drives everything. It takes your raw content and gets it ready for your audience, making sure every part of the workflow connects smoothly.
The Core Components of Server-Side Streaming
To really get a handle on this, let's break down the essential pieces of the puzzle. These are the components that have to work together to give your audience a smooth viewing experience.
- Media Preparation: It all starts here. You have to encode your raw video files, which means choosing a codec (like the universally supported H.264) and a container (like MP4) to compress your video into a format that's ready for streaming.
- Ingest Protocol: This is the language your broadcasting software uses to talk to your server. RTMP (Real-Time Messaging Protocol) has been the go-to for years because it’s fast and has very low latency, which makes it a good fit for sending a live feed to your server.
- Server Configuration: This is where you tell your media server software—whether it's something like NGINX-RTMP or Ant Media Server—what to do. You'll set it up to catch the incoming stream, process it, and get it ready for delivery.
- Transcoding and Delivery: One size definitely doesn't fit all in streaming. To make sure everyone can watch, your server will transcode your single high-quality stream into several versions at different bitrates. It then packages these using modern protocols like HLS or DASH. This allows the viewer's player to automatically pick the best quality for their connection, which is how you avoid that dreaded buffering wheel.
Getting Your Media Files Ready to Stream
A stable stream starts with well-prepared source files. Before any video hits your server, it has to be encoded. Think of encoding as a smart compression process that shrinks your video into a format that's suited to streaming, without completely tanking the quality. It's a balancing act, but it’s a non-negotiable step for getting a smooth stream.
You'll mainly be dealing with two codecs: H.264 (also called AVC) and H.265 (HEVC). H.264 is the old reliable—it works on just about every device imaginable. Its successor, H.265, is much more efficient, giving you the same quality at a lower bitrate. That's great for saving bandwidth, but it takes more horsepower to encode and might not play nice with older hardware.
Picking Your Codec and Container
For most people, H.264 is the go-to choice. It’s the safest bet to make sure your audience can actually watch your content without running into problems.
Once encoded, your video needs to be packaged into a container format. You’ll typically see MP4 and TS (Transport Stream). MP4 is good for standard video files (video-on-demand), while TS is a common format in the broadcast world and live streaming setups.
To handle all this, one of the best tools out there is FFmpeg. It's a free, command-line workhorse that gives you pinpoint control over every little detail of the encoding process.
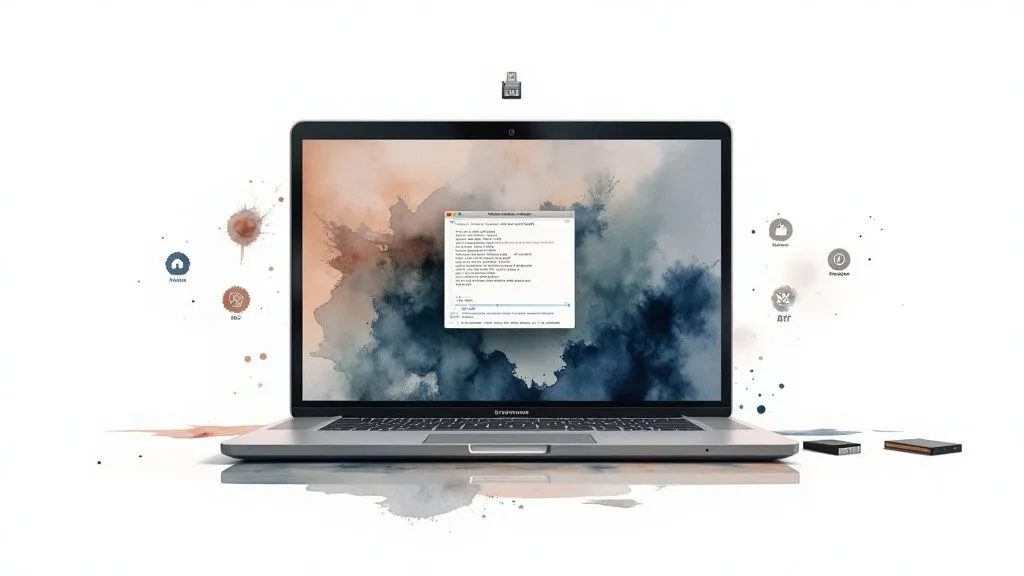
The FFmpeg website is your hub for documentation and downloads for this essential tool. It’s a complete framework that’s a must-have for anyone serious about streaming.
A Hands-On Example with FFmpeg
The best way to get a feel for this is to just do it. Let’s say you have a video file called source.mov and you want to get it ready for your stream by converting it to an MP4 using the H.264 codec. If you want a deep dive on this, our guide on how to convert MP4 files to H.264 walks you through the commands in more detail.
But to get you started, here's a basic FFmpeg command you can run in your terminal:
ffmpeg -i source.mov -c:v libx264 -preset medium -crf 23 -c:a aac -b:a 128k output.mp4
Let’s break down what’s happening here:
- -i source.mov: This is your input file.
- -c:v libx264: This tells FFmpeg to use the H.264 video codec.
- -preset medium: This strikes a good balance between encoding speed and the final file size.
- -crf 23: This sets the quality. It's a bit counterintuitive, but a lower number is better quality. A range of 18-28 is usually the sweet spot.
- -c:a aac: Here we're choosing the AAC audio codec, which is standard.
- -b:a 128k: And finally, we're setting the audio bitrate to a crisp 128 kbps.
Pro Tip: Before you batch encode your entire video library, do a few short test runs. Try different CRF values (like 20, 23, and 26) on a small clip to see what looks best for your content. Finding the right balance between quality and file size upfront will save you a ton of time and storage down the road.
Configuring Your Server for Ingest and Storage
Alright, your media is encoded and ready to go. Now it's time to build the engine for your broadcast: the media server. This is the central hub where your signal lands and everything else happens. Nailing this configuration is the difference between a smooth stream and a frustrating one.
Think of software like NGINX (with the RTMP module) or a dedicated tool like Ant Media Server as the receiving dock for your video. Your first job is to set up an RTMP ingest point. This is simply a unique address your server listens on, waiting for your broadcast software to connect and start sending video.
Securing Your Stream and Managing Ingest
You wouldn't leave your front door wide open, and the same goes for your stream. An unprotected RTMP endpoint is like an open invitation for anyone to hijack your channel and broadcast whatever they want. That's where stream keys come in.
A stream key is just a long, random string of characters that acts like a password. When you set up your server, you'll configure it to require this key as part of the RTMP address. This is a simple but powerful security measure that ensures only your broadcasting software can connect. It's the exact same system YouTube and Twitch use to keep their creators' channels secure. If you want to dig deeper into the tech, you can learn more about what RTMP is in our detailed guide.
Choosing the Right Storage Strategy
Once the video hits your server, you need a plan for where to put it. This decision isn't just about storage space; it affects your budget, your ability to offer video-on-demand (VOD), and the overall resilience of your setup. You've got two main paths to choose from.
Local Disk Storage: This is the straightforward approach—saving the video files directly to your server's hard drive. It's incredibly fast, which is great for creating instant replays or quick VOD clips. The main downside? You're limited by the physical disk space, and scaling up means physically adding more drives.
Cloud Object Storage: Using a service like Amazon S3 or Wasabi gives you almost unlimited space and high durability. You pay as you go, which can be very cost-effective for building a large VOD library. This is the go-to choice for long-term archiving and building a scalable, accessible media library.
A Practical Takeaway: I've found that a hybrid strategy often works best. Use your server's local storage as a "hot" buffer for the live stream and recently finished recordings. Then, set up an automated script to move older files to a cheaper cloud solution like Wasabi for long-term archiving. This gives you the speed of local disk when you need it and the lower-cost scale of the cloud for everything else.
Delivering a Smooth Viewing Experience
Getting your server set up is a great first step, but it’s only half the story. The real measure of success is whether your viewers get a smooth, buffer-free stream. This is where adaptive bitrate streaming helps.
The whole idea is to create multiple versions of your stream at different quality levels, all at the same time. Your server does the heavy lifting, taking your single high-quality video feed and transcoding it on the fly into several smaller, lower-bitrate versions.
So, what does this do for the viewer? Their video player is smart enough to check their internet connection in real time. If they move to a spot with weak Wi-Fi or their phone switches from 5G to a slower signal, the player just grabs a lower-quality version of the stream. The switch is usually not noticeable, and the video keeps playing without that dreaded buffering wheel.
HLS and DASH: The Modern Delivery Duo
To do this, you'll rely on a couple of key protocols. The two big players in the industry are HLS (HTTP Live Streaming), which came from Apple, and DASH (Dynamic Adaptive Streaming over HTTP), an open international standard. They both work in a similar, clever way.
Your media server chops up all those different quality streams into small video segments, usually just a few seconds long. Then, it creates a text file called a manifest (.m3u8 for HLS, .mpd for DASH). Think of this manifest as a table of contents for the player. It lists all the available quality levels and tells the player how to piece the video segments together.
When someone clicks play, their device downloads this manifest first. It usually starts with a lower-quality stream to get the video playing instantly, then quickly jumps to the best quality their connection can handle. For a deeper dive into choosing settings, check out our guide on choosing the right bitrate for streaming.
Building Your Adaptive Bitrate Ladder
Setting up your transcoder profiles is a critical step. This collection of profiles is often called a "bitrate ladder," and its job is to make sure you have a suitable stream for everyone—from the person watching on a 4K TV with fiber internet to someone on a shaky 4G connection.
Here's a practical example of what a bitrate ladder for a 1080p source stream might look like.
Adaptive Bitrate Streaming Profile Example
This table shows a typical set of delivery profiles you could use to serve a 1080p source video from your own server to a wide range of devices and network conditions. These are not YouTube ingest settings: for sending a live stream to YouTube, see YouTube's recommended bitrates.
| Resolution | Video Bitrate (kbps) | Audio Bitrate (kbps) | Target Device |
|---|---|---|---|
| 1920x1080 | 4500 | 128 | Smart TVs, Desktops (High-Speed) |
| 1280x720 | 2500 | 128 | Tablets, Laptops (Good Wi-Fi) |
| 854x480 | 1200 | 96 | Smartphones (Stable Cellular) |
| 640x360 | 800 | 64 | Low-Bandwidth Connections |
With a ladder like this, you’re well-equipped to give your entire audience a reliable and high-quality viewing experience, no matter how they’re watching.
Expert Insight: Your work isn't done at the server. If you want to reach a global audience, a Content Delivery Network (CDN) is close to essential. A CDN takes your video segments and copies them to servers all over the world. When someone in another country hits play, they get the video from a server physically close to them. This cuts lag and load times.
Turning Your Stream into a 24/7 Channel (And Making Money)
Once you've nailed down the technical side of your stream, the real fun begins. You can stop thinking like an engineer and start thinking like a content strategist. This is where you transform a simple broadcast into a sustainable, engaging channel that can actually earn you money.
The first step is to automate your stream. Think about it: instead of only being live when you're actively broadcasting, you can create a 24/7 destination. It's the same playbook used by those popular lo-fi music channels or the ambient nature scenes on YouTube. By setting up a playlist of your pre-recorded videos to loop on your server, your channel is always on. This means your channel stays live, even when you’re asleep.
Finding the Right Way to Get Paid
With a non-stop stream of content, you need a plan to make it profitable. The good news is there are a few well-worn paths for video monetization. You just have to pick the one that makes the most sense for your audience and what you're creating.
You’ve basically got three main options:
- AVOD (Advertising-Based Video on Demand): This is the classic model—your content is free to watch, and you make money from ads. It suits you if you want to reach the biggest possible audience right out of the gate.
- SVOD (Subscription Video on Demand): Viewers pay a monthly or yearly fee for access, just like with Netflix. This is a great route if you already have a loyal following and a deep library of must-see content.
- TVOD (Transactional Video on Demand): This is your pay-per-view option. People pay a one-time fee to rent or buy a specific video, like a feature film or a special live event.
A lot of creators assume subscriptions are the only way to make serious money, but that's not always true. For a new channel, an ad-supported model is often the easiest place to start, because viewers pay nothing.
Putting Ads and Paywalls into Action
To actually implement any of this, you’ll need to plug in the right tools. If you’re going the ad route (AVOD), you'll team up with an ad server or network. I'm a big fan of Server-Side Ad Insertion (SSAI), where the ads are literally stitched into your video feed on the server. This creates a smooth, TV-like experience and is harder for ad blockers to remove.
For subscriptions (SVOD) or pay-per-view (TVOD), you'll need to set up a paywall and connect a payment processor. This is what keeps your premium streams secure, ensuring only paying customers get access. It’s how you turn your server from a broadcasting hobby into a real business.
Common Questions About Server-Side Streaming
Once you start digging into streaming from your own server, a few questions tend to pop up again and again. Getting these sorted out early will save you a ton of frustration and help you build a solid streaming setup right from the start.
Let's dive into some of the most frequent ones I hear.
What Is the Biggest Challenge of Self-Hosting a Stream?
Hands down, the single biggest headache is managing bandwidth and scale. Your server’s internet connection has to have enough upload muscle to handle not just your stream's quality, but every single person watching it. As soon as your audience starts to grow, that single server becomes a chokepoint, and your viewers get stuck with the dreaded buffering wheel.
This is why a Content Delivery Network (or CDN) is close to essential for a large audience. A CDN takes your single stream and smartly distributes it across a global network of servers. Viewers then pull the video from a server physically close to them, which improves performance and reliability.
Pro Tip: It's easy to underestimate your bandwidth needs. Every viewer of the 1080p rendition in the ladder above uses about 4.5 Mbps of your server's upload. For 100 viewers, that is about 450 Mbps. A CDN isn't just a nice-to-have; it's a must for growth.
How Much Does a Video Streaming Server Cost?
This is a classic "it depends" question, but the cost can swing dramatically. For a hobbyist project, you could spin up a small cloud server—think a basic DigitalOcean Droplet or an AWS EC2 instance—running open-source software like NGINX-RTMP for as little as $10 to $40 a month. This works if you have just a handful of viewers.
But the costs ramp up fast. Once you need to handle more traffic, transcode video in real-time, or store a library of content, you're easily looking at hundreds or even thousands of dollars.
The three big things that will drive your bill are:
- CPU Power: Transcoding video is one of the most CPU-hungry tasks you can throw at a server. More processing power costs more money.
- Storage: Your library of past streams and video-on-demand content needs a place to live, and that space isn't free.
- Bandwidth: This is the big one and often the most unpredictable part of your bill. Cloud providers charge for data that leaves their network (egress), and it can add up quickly with a popular stream.
Can I Stream to YouTube and My Website at the Same Time?
You absolutely can. This is called simulcasting (or multistreaming), and it's a good way to get your content in front of as many eyes as possible.
Most modern media server software lets you take your one incoming RTMP stream and re-broadcast it to multiple destinations simultaneously. You’d just plug in the RTMP URL and stream key for your YouTube channel, your Twitch page, or any other service you want to hit. At the same time, your server generates the HLS or DASH stream that your website's video player uses. It's an efficient way to be everywhere at once without needing a bunch of different encoders or extra upload bandwidth.
For YouTube creators who want a permanent, 24/7 broadcast without managing servers, 247 LiveStream runs the stream for you. You upload your existing videos, set the playlist order or shuffle, and cloud servers stream the looping playlist over RTMP at 1080p 30 FPS. It costs $16 per month, or $14 per month billed yearly. Find out more at the 247 LiveStream website.