
Before we dive into how to convert, let's clear up one of the most common mix-ups in the video world. When we talk about converting MP4 to H.264, it's important to know they aren't competing formats. H.264 is the video codec (the compression method) that often lives inside an MP4 container (the file itself).
The real goal here is to make sure your MP4 file is using the right guts—the H.264 codec—for maximum compatibility.
Why Bother Converting if It's Already an MP4?
I get this question all the time. If your file already ends in .mp4, why does it need converting? It all comes down to what's inside that file.
Think of an MP4 file as a shipping box. That box can hold all sorts of things. It might contain video compressed with the newer, super-efficient H.265 (HEVC) codec, or maybe an older format. While those other codecs have their place, they lack the one thing H.264 offers: it plays almost everywhere.
To help clarify this, let's break down the two concepts.
MP4 Container vs H.264 Codec at a Glance
This table sums up the relationship between the container and the codec.
| Attribute | MP4 (Container) | H.264/AVC (Codec) |
|---|---|---|
| Primary Role | A digital "box" or wrapper that holds video, audio, and metadata. | The recipe used to compress and decompress the actual video data. |
| File Extension | .mp4 |
None; it's the data inside the file. |
| What It Contains | Can hold various video codecs (H.264, H.265, AV1) and audio codecs (AAC, MP3). | The raw visual information, encoded into an efficient stream. |
| Analogy | A gift box. | The specific gift inside the box. |
In short, the MP4 is just the package. H.264 is what's inside, and for streaming, it's the most widely supported choice.
H.264: The Most Compatible Codec
For anyone creating content, especially for a live stream, compatibility is everything. You can't afford for your video to not play. H.264, officially known as Advanced Video Coding (AVC), is the established global standard for a reason. It’s supported by practically every device with a screen.
- Web Browsers: Chrome, Firefox, Safari—you name it. They all play H.264 video right out of the box, no plugins needed.
- Smart TVs and Streaming Boxes: From the latest Samsung TV to a trusty Roku, the hardware is built to decode H.264 smoothly.
- Mobile Devices: Every modern smartphone and tablet is optimized to handle H.264 efficiently, which helps save precious battery life for viewers on the go.
- Major Streaming Platforms: YouTube and Twitch both accept H.264 for live ingest.
This reach means that when you convert your MP4 to use H.264, you create a file that almost every device and platform can play.
Key Takeaway: While newer codecs might offer better compression, they come with a big compatibility risk. H.264 is still the safest, most reliable choice to make sure your video plays across every platform and device, which is absolutely critical for consistent streaming.
Why This Is Crucial for 24/7 Streaming
This need for universal compatibility gets even more intense when you're running a continuous broadcast. A stream that is always on depends on predictable, stable files. For a deeper dive into the technical side, check out our guide on what is 24/7 live streaming.
Using a less-supported codec is a gamble. It could lead to a chunk of your audience seeing nothing but a black screen, a stuttering feed, or a "format not supported" error.
Newer codecs like AV1 compress better, but far more hardware can decode H.264.
Mastering this conversion process is a fundamental skill. It makes sure your video is not just high-quality, but also plays reliably.
Choosing the Right H.264 Settings for Streaming
Just because your file is an MP4 using the H.264 codec doesn’t mean it’s ready to stream. The encoding settings matter just as much. Getting them right is the difference between a smooth stream and a pixelated, buffering one.
Every platform, from YouTube to dedicated 24/7 streaming services, has its own technical recipe. If your video doesn't match their expectations, you risk poor playback or even having your stream flat-out rejected. So, let's get into the nitty-gritty of the settings that truly matter.
Decoding Resolution and Bitrate
Resolution is easy enough—it’s the clarity of your video, like 1080p (1920x1080). But resolution is nothing without the right bitrate to back it up.
Bitrate is simply the amount of data packed into each second of your video, measured in kilobits per second (kbps). For live streaming, the most critical choice you'll make is the bitrate mode.
- Variable Bitrate (VBR): VBR is smart for file storage. It uses more data for fast-action scenes and less for static shots, which is great for videos you plan to upload for on-demand viewing.
- Constant Bitrate (CBR): For live streaming, use CBR. It sends a steady, predictable stream of data, which is exactly what you need to avoid network hiccups and that dreaded buffering wheel.
You'll need to balance your resolution with a bitrate your internet connection can comfortably handle. To dive deeper into finding that sweet spot, check out our guide on picking the best bitrate for streaming.
Profile and Keyframe Interval
Two other settings often get overlooked but are crucial for compatibility when you convert an MP4 to H.264: the Profile and the Keyframe Interval.
First up is the Profile. Think of it as a set of rules the encoder follows. You’ll mostly encounter two options:
- Main Profile: An older standard that works well for maximum compatibility, especially with legacy devices. It’s a safe bet but not always the best quality.
- High Profile: This is the modern standard for HD video on the web. It delivers better quality at lower bitrates and plays on nearly every modern device. Always use the High Profile unless you have a very specific reason to support ancient hardware.
Next is the Keyframe Interval, sometimes called GOP size. A keyframe is a complete picture of a video frame; all the frames that follow it are just data describing the changes from that keyframe. For live streaming, a 2-second keyframe interval is the standard. YouTube recommends 2 seconds and says not to exceed 4.
Why 2 seconds? It allows viewers to jump into your stream and start watching almost instantly. It also helps platforms insert ads smoothly without disrupting the feed. A mismatched keyframe interval is one of the most common, and frustrating, causes of stream errors.
This simple flowchart helps visualize the first check you should always make—is your file's codec even ready for streaming?
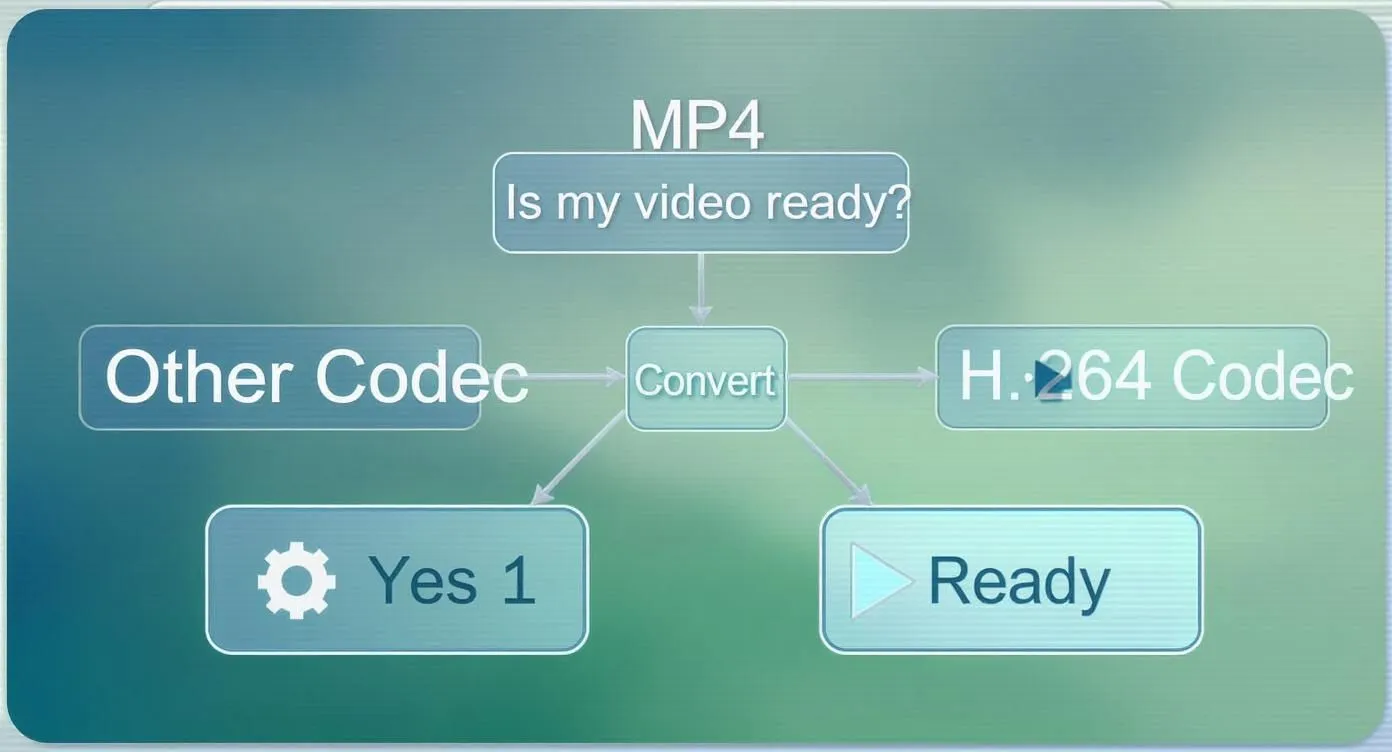
It’s a good reminder to confirm you're working with H.264 before you start tweaking the finer details.
Don't Forget Audio Settings
Finally, bad audio can ruin a great video. The industry standard audio codec to pair with H.264 video is AAC (Advanced Audio Coding). It’s efficient, sounds great, and is supported everywhere.
For most streams, setting your audio bitrate between 128 kbps and 160 kbps works well. This gives you clear stereo sound that won’t eat up your bandwidth.
Dialing in these video and audio parameters is how you create a stable H.264 file that's ready for any streaming destination you throw at it.
To make this even easier, here's a table comparing our recommended settings for the two most common use cases: uploading a video to YouTube and running a 24/7 livestream.
Recommended H.264 Settings for YouTube and 24/7 Livestreams
| Setting | YouTube Upload (1080p) | 24/7 Livestream (1080p) | Best Practice Tip |
|---|---|---|---|
| Bitrate Mode | VBR (2-Pass) | CBR (Constant) | Use VBR for file-based uploads to get the best quality-to-size ratio. CBR is essential for stream stability. |
| Video Bitrate | 8,000-12,000 kbps | 10,000 kbps (1080p30) | YouTube recommends 10 Mbps for 1080p30 live with H.264. Go lower if your upload speed cannot carry it. |
| Profile | High | High | High Profile offers the best compression and is universally supported on modern devices. |
| Keyframe Interval | Auto (or 2 seconds) | 2 seconds | YouTube recommends 2 seconds for live streams and says not to exceed 4 seconds. |
| Audio Codec | AAC | AAC | AAC is the standard for a reason—it’s high quality and highly compatible. |
| Audio Bitrate | 384 kbps (Stereo) | 128-160 kbps (Stereo) | YouTube recommends higher audio quality for uploads. For live, YouTube recommends 128 kbps for stereo. |
As you can see, while many settings are similar, the key differences in bitrate mode and rate are critical. An uploaded file is all about maximum quality, while a live broadcast prioritizes stability and consistency above all else.
Getting Hands-On with FFmpeg for H.264 Conversion
If you're serious about having total control over your video files, you'll eventually find your way to the command line. This is where the real power lies, and at the center of it all is FFmpeg, the most widely used open-source multimedia framework. It’s a powerful tool that can decode, encode, and transcode just about any video format you can throw at it.
Don't let the command line intimidate you. We’re going to cut through the noise and focus on the practical commands you actually need, whether you're prepping a file for YouTube or a stable video loop for your 24/7 stream.
The Basic Conversion Command
Let's start simple. At its heart, a command to convert a video to H.264 is straightforward. Assuming you've got FFmpeg installed, you can pop open your terminal (or Command Prompt on Windows) and run this:
ffmpeg -i input.mp4 -c:v libx264 output.mp4
So, what’s happening here?
ffmpeg: This is just you telling the computer to run the FFmpeg program.-i input.mp4: The-iflag is for "input," telling FFmpeg which file you want to work on.-c:v libx264: This is the important part. It tells FFmpeg to use thelibx264library for the video codec (-c:v), which is the best and most widely used H.264 encoder out there.output.mp4: This is simply the name you want for your new file.
This command absolutely works, but it's like telling a chef to "make dinner" without any other instructions. For professional results, we need to add a few more ingredients.
Encoding for a YouTube Upload
When you're uploading to YouTube, the name of the game is quality. You want to give YouTube's servers the best possible file to work with, so their own re-encoding process doesn't degrade your video. To do that, we can use a quality-based setting called Constant Rate Factor (CRF).
With CRF, a lower number means higher quality. From my experience, a CRF value of 18 works well. It's often considered visually lossless, meaning you won't be able to tell the difference between the source and the new file.
Here's a command I use all the time for high-quality 1080p YouTube uploads:
ffmpeg -i input.mp4 -c:v libx264 -preset slow -crf 18 -c:a aac -b:a 384k output_youtube.mp4
What we added:
-preset slow: This tells the encoder to take its time to achieve better compression without sacrificing quality.-crf 18: We're setting that high-quality level we just talked about.-c:a aac -b:a 384k: This specifies the AAC audio codec at a high bitrate, ensuring your sound is just as crisp as your video.
Building a Stable File for 24/7 Streaming
For a 24/7 stream, your priority shifts from maximum quality to stability. You need a file with a Constant Bitrate (CBR) and a strict, predictable keyframe interval to prevent any buffering or playback issues for your viewers.
This command creates a 1080p30 CBR file at YouTube's recommended live bitrate:
ffmpeg -i input.mp4 -c:v libx264 -b:v 10000k -minrate 10000k -maxrate 10000k -bufsize 10000k -profile:v high -g 60 -c:a aac -b:a 128k output_livestream.mp4
Let’s unpack the crucial new parts:
-b:v 10000k: This sets our target video bitrate to 10,000 kbps, YouTube's recommendation for 1080p at 30 fps. Lower it if your upload speed is limited.-minrate,-maxrate,-bufsize: These flags work together to force the encoder to stick to that 10,000 kbps target, creating a true CBR file. This is key for streaming stability.-profile:v high: We're using the High profile, which offers a good mix of efficiency and compatibility with most devices.-g 60: This sets our keyframe interval. For a 30 FPS video, 60 frames gives us an exact 2-second interval (60 frames / 30 fps = 2 seconds), which is the standard recommended by most streaming platforms.
Pro Tip: Don't convert files one by one—that's a recipe for a headache. You can process an entire folder of videos using a simple loop. On Windows, a command like
for %i in (*.mp4) do ffmpeg -i "%i" [your settings here] "converted\%~ni.mp4"will process every MP4 in the folder and put the new files in a "converted" subfolder. It's a massive time-saver.
Not everyone wants to live in a command-line terminal, and that's fine. For a more visual approach, graphical user interface (GUI) tools are a good alternative.
You don't give up quality. Popular free GUI apps like HandBrake use the same x264 encoder and FFmpeg libraries under the hood.
This means you can convert your MP4 to H.264 with the same professional-grade results, but with a much friendlier user experience. All those critical settings—bitrate, profile, keyframes—are laid out in simple dropdown menus and text boxes. It’s the same engine, just with a different dashboard.
Getting Around in HandBrake
HandBrake is my go-to recommendation for anyone who wants precise control without the command line. It's free and capable. When you first launch it, you just point it to your source video file, and it presents you with a clean, organized workspace.
Here's what you'll see. It's not nearly as intimidating as it might look.
On the right, you have presets for quick jobs, but the real power is in the main tabs: Dimensions, Filters, Video, and Audio. We'll be focused on the "Video" and "Audio" tabs.
Dialing in Your H.264 Settings
Let's walk through how to apply our recommended settings for a 24/7 livestream using HandBrake. It's a straightforward process once you know where to look.
First, open your source MP4 file. You can start with a general preset like "Fast 1080p30" just to get the basic resolution and frame rate settings in place.
Now, click over to the Video tab.
- Video Encoder: Make sure this is set to H.264 (x264).
- Framerate: Set this to match your source footage (e.g., 30 FPS) and make sure "Constant Framerate" is selected.
- Rate Control: This is a big one. Switch the default from "Constant Quality" to Constant Bitrate. Then, in the box, enter your target bitrate. For a 1080p30 stream, YouTube recommends 10000 kbps.
- Encoder Profile: Set this to High.
Pro Tip: The keyframe interval is crucial for streaming, but it's a bit hidden. Look for the "Extra Options" box and type in
keyint=60. For a 30 FPS video, this forces a keyframe every 60 frames, giving you the 2-second interval that streaming platforms recommend.
Finally, pop over to the "Audio" tab. Choose the AAC codec and set the bitrate to 128 kbps. That’s it. In just a few clicks, you've configured a file for reliable streaming, with no code required.
Checking Your Work: How to Verify and Troubleshoot Your Conversion
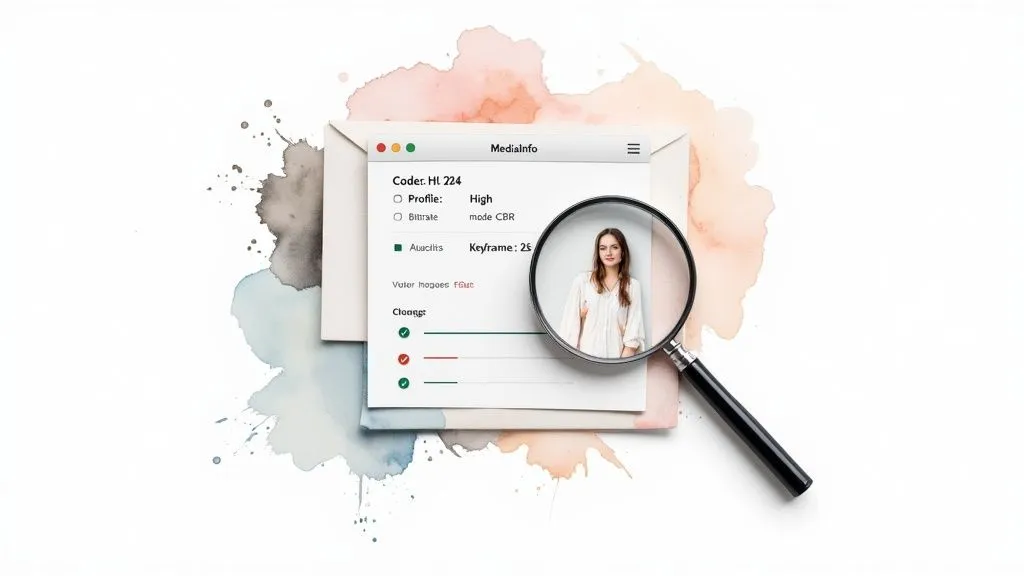
Alright, so you've run the conversion. You might think you're done, but I've learned from experience that one final check can save you a world of pain later. Take a minute to verify that your new file has the right settings for streaming.
You don't need any fancy or expensive tools for this. I always recommend a free utility called MediaInfo. It's a small program that lets you pop the hood on any video file and see exactly what's going on. Just install it, open your new H.264 file, and it'll spell out all the technical details.
Your Post-Conversion Checklist
Once you have your file open in MediaInfo, don't let the wall of information intimidate you. You're just hunting for a few specific details to make sure the conversion went as planned.
Here’s what I always look for:
- Format/Codec ID: You should see AVC listed for the video stream. AVC stands for Advanced Video Coding, which is just another name for H.264. If you see that, you're on the right track.
- Bitrate Mode: This needs to say Constant. A variable bitrate can cause all sorts of buffering and stability problems during a live broadcast, so look for "Constant".
- Profile: Look for something like
High@L4.0. The key here is the "High" part. This confirms you’re using the right profile for the best quality and compatibility. - Keyframe Interval: This one's a bit tricky. MediaInfo doesn't just say "2 seconds." Instead, you'll see a "GOP" (Group of Pictures) setting. For a 30fps video, a setting like M=1, N=60 is a good sign you’ve hit the 2-second target.
If those four things check out, you can be confident your file is ready for just about any streaming platform. This simple step catches many of the issues that lead to upload rejections.
Solving Common Conversion Problems
Of course, sometimes things just don't go right. Even a file that looks right on paper can have issues. Here are a couple of the most common snags I've run into and how to fix them.
Audio drifting out of sync with the video is a classic. This usually points to a source file that had a variable frame rate. The fix is almost always to re-encode the file but this time, force a constant frame rate (like 30 FPS) in your FFmpeg or HandBrake settings. That locks everything together.
Another frustrating one is when a platform rejects your file even though you know it's H.264. This can be a deeper issue, sometimes related to the transmission protocol used to send the file to the server. If you want to get into the weeds on this, our guide on what RTMP is is a great place to start. It explains how your video makes its journey from you to the viewer.
Key Insight: If a platform flat-out rejects your upload, my first suspect is always the keyframe interval. A platform might require a strict 2-second interval, and if yours is even slightly off, it will fail. In my experience, this is a common reason for an otherwise valid H.264 file getting rejected. Always double-check and re-encode with a strict keyframe setting if needed.
Got Questions About MP4 and H.264? Let's Clear Things Up
Even after you've got your tools lined up, it's natural to have a few questions about the whole MP4 to H.264 conversion process. Let's tackle the big ones I hear all the time so you can get your stream optimized with confidence.
Will I Lose Video Quality When I Convert?
This is probably the number one concern, and the short answer is: not if you do it right. It's a myth that converting automatically means a drop in quality.
If your original MP4 file was encoded with a different codec, like H.265 (HEVC), you can convert it to H.264 without any noticeable quality loss, as long as you give it a high enough bitrate. The same goes for re-encoding an H.264 video just to tweak the settings; stick to the recommended bitrates for streaming, and your video will look just as crisp as the original.
The point of this conversion isn't just about shrinking files. It's about reliable playback on every device. Keeping your quality high is the top priority.
Isn't H.265 Supposed to Be Better Than H.264?
On paper, yes, but in the real world of streaming, "better" is all about compatibility. H.265 (or HEVC) is a more modern, efficient codec. It can deliver the same quality as H.264 at a much lower bitrate, which is useful for saving space on your hard drive, especially with massive 4K files.
But when it comes to streaming to a wide audience, H.264 is still the safer choice. Why? Because virtually every device out there—from web browsers and smart TVs to smartphones and tablets—can decode H.264 video using dedicated hardware. This means smooth playback on almost every device.
For a 24/7 broadcast or any stream aimed at a broad audience, H.264 is hands-down the most reliable and safest bet.
Why Is My New H.264 File Bigger Than the Original?
I get this question a lot. It can be a real head-scratcher at first, but the reason is usually straightforward. This typically happens for one of two reasons: your original MP4 used a more efficient codec (like H.265), or it was encoded at a super low bitrate to begin with.
When you convert that video to H.264 and use a bitrate that’s ideal for streaming—like the 10,000 kbps YouTube recommends for a 1080p30 live stream—the file size is going to go up. Think of it as a trade-off: you're swapping a smaller file for a universally compatible video that’s built for smooth, buffer-free performance on streaming platforms.
Want to keep your channel live around the clock? 247 LiveStream runs permanent YouTube streams from your pre-recorded videos on cloud servers, at 1080p 30 FPS. Your computer can be off. It costs $16 per month, or $14 per month billed yearly. See how it works at 247livestream.live.