The right streaming bitrate depends on your platform, resolution and frame rate. For a 1080p stream at 30 FPS with H.264, YouTube recommends 10 Mbps (10,000 kbps), and Twitch recommends about 4,500 kbps. Your upload speed must stay comfortably above the bitrate you choose.
What Bitrate Actually Means for Your Stream

Think of your live stream as water flowing through a pipe to your viewers. In this analogy, bitrate is the width of that pipe. A wider pipe—a higher bitrate—lets more water (your stream's data) flow through every second. The result is a powerful, high-quality stream. On the flip side, a narrow pipe—a lower bitrate—restricts that flow, delivering less data and a weaker, choppier stream.
Bitrate is measured in bits per second (bps), but you'll almost always see it discussed in kilobits per second (kbps) or megabits per second (Mbps). For reference, one Mbps is just 1,000 kbps. This number tells you exactly how much data you're sending to the streaming platform's servers every single second.
The Two Halves of Your Stream's Quality
Your total bitrate isn't just one number; it's actually two separate streams of data—video and audio—that get bundled together. Both are absolutely critical for a good broadcast, and it’s important to understand how they team up.
Video Bitrate: This is the heavyweight. It carries the vast majority of the data and directly controls the visual clarity, sharpness, and smoothness of your picture. Higher resolutions like 1080p or fast-motion content like a 60 FPS gaming stream demand a much higher video bitrate to look good.
Audio Bitrate: While it uses way less data, audio quality is arguably just as important. Audio bitrate determines how rich and clear your sound is. If you skimp here, your voice can sound muffled, thin, or even robotic, which can ruin the entire viewing experience no matter how good the video looks.
Your total bitrate is simply your video and audio bitrates added together. So, if you set your video to 4,500 kbps and your audio to 160 kbps, your encoder will be uploading a total of 4,660 kbps of data every second.
Why Bitrate Is the Foundation
Every choice you make about your stream's quality, from the resolution you pick to the framerate you target, is completely dependent on your bitrate. It’s the technical foundation that supports everything your audience sees and hears.
Set it too high for your internet connection, and you’ll get dropped frames and endless buffering. Set it too low, and you’ll end up with a pixelated, blurry mess, no matter how great your camera is.
This is especially true for continuous broadcasts. For anyone looking into the world of always-on content, understanding that a stable bitrate is the bedrock of a successful stream is step one. You can learn more about this in our guide on what 24/7 live streaming is and how it can help you grow. Getting the bitrate right from the start ensures your stream stays stable and professional, whether it’s live for an hour or an entire year.
Finding the Balance Between Quality and Bandwidth

Choosing the right bitrate for streaming is always a trade-off. On one hand, you want that crisp, high-definition broadcast that looks amazing. On the other, you’re constrained by your internet connection and, just as importantly, the connections of your viewers. If you push for maximum quality without enough bandwidth to back it up, you’re just setting everyone up for a frustrating, buffer-filled stream.
The real trick is sending just enough data for a great picture without completely maxing out your upload speed. When your bitrate is too low for your resolution, the image quality takes a nosedive. That’s when you start seeing those tell-tale signs that your stream is starved for data.
Spotting the Signs of a Low Bitrate
Ever seen a stream where fast action devolves into a blurry soup of chunky pixels? That's the classic symptom of a bitrate that’s too low. The encoder simply doesn't have enough data to describe all the complex changes happening on screen from one frame to the next.
Keep an eye out for these visual cues:
- Pixelation: The image looks blocky or "chunky," especially in detailed areas.
- Blurry Motion: During fast-paced scenes in games or sports, everything loses its sharpness and smears together.
- Color Banding: Smooth color gradients, like a sky at sunset, show harsh lines between colors instead of blending smoothly.
These issues pop up because your encoder is being forced to cut corners. To squeeze the video into the small data pipe you've given it, it has to throw away visual information. This is exactly why a simple "talking head" stream can look fine at a lower bitrate, but a high-action gameplay stream needs way more data to stay clear.
The right bitrate is high enough to prevent these visual problems during your stream's busiest moments, but low enough that your internet connection can handle it without breaking a sweat.
How Platforms Solve This for Viewers
The good news is you don’t have to find one single bitrate that works for every single person watching. Modern platforms like YouTube and Twitch use a smart technology called Adaptive Bitrate Streaming (ABR) to manage this on the viewer's side.
When you send your stream to the platform, their servers get to work transcoding it. This creates several copies of your stream at different bitrates and quality levels. When someone tunes in, their video player checks their internet speed and automatically grabs the best version they can watch smoothly. If their connection suddenly dips, the player just switches to a lower-quality stream on the fly, often without them even noticing.
This is what lets someone on a spotty mobile connection and another on a blazing-fast fiber line watch the same event without issues. As the creator, your job is to send the best possible "source" stream you can reliably manage. Your bitrate should balance quality and stability.
Finding the Right Bitrate for Your Stream
Alright, now that we have a feel for the push-and-pull between quality and bandwidth, let's talk numbers. Picking the right bitrate for streaming isn't about finding one secret setting that works for everyone. It's about finding a smart starting point based on your resolution, framerate, and what you’re actually broadcasting. A simple talking-head stream just doesn't need as much data to look sharp as a chaotic, fast-paced gaming stream.
Think of the numbers I'm about to share as a starting recipe. Your resolution and framerate are the main ingredients, but you'll have to tweak the amounts depending on your stream's content. The more action and movement on screen, the higher the bitrate you'll need to keep things from getting pixelated.
How Video Codecs Change Everything
Before we dive into a chart of numbers, we need to talk about your video codec. A codec is simply the technology that compresses your video to send it over the internet. The one you'll see everywhere is H.264 (AVC)—it’s the old reliable, supported by pretty much every device and platform out there.
But technology moves fast. Newer codecs like H.265 (HEVC) and the open-source AV1 are way more efficient. They can deliver the same visual quality (or even better) using a much lower bitrate. This is huge—it means you can get a cleaner-looking stream without hogging your upload bandwidth. The only catch? These newer codecs require a more powerful computer to encode your video in real-time, so they might not be an option for everyone just yet.
Better codecs matter most when your upload speed is limited. The bitrate you choose is the foundation of their experience. Too low, and your video is a blurry, artifact-filled mess. Too high, and you risk constant buffering for anyone with a slower connection. If you want to go deeper on this, you can learn more about how codecs influence video bitrates for streaming.
Recommended Streaming Bitrates by Resolution, Framerate, and Codec
The table below shows YouTube's official live encoder settings (YouTube Help: live encoder settings). YouTube gives one recommended value for H.264 and a minimum-to-maximum range for AV1 and H.265 (HEVC). Other platforms have their own limits, covered further down.
Pro Tip: Not sure where to begin? Start with the recommended value for your setup, or lower if your upload speed is limited. Do a quick test stream and watch it on your phone or another computer. If you see pixelation during fast movement, bump your bitrate up by 500 kbps and try again.
| Resolution & Framerate | H.264 recommended | AV1 / H.265 range |
|---|---|---|
| 720p at 30fps | 4 Mbps (4,000 kbps) | 3 – 8 Mbps |
| 720p at 60fps | 6 Mbps (6,000 kbps) | 3 – 8 Mbps |
| 1080p at 30fps | 10 Mbps (10,000 kbps) | 3 – 8 Mbps |
| 1080p at 60fps | 12 Mbps (12,000 kbps) | 4 – 10 Mbps |
The AV1 and H.265 ranges start well below the H.264 values, because these codecs compress video more efficiently.
Don't Forget to Adjust for Your Content
The table gives you a baseline, but your actual content is the final piece of the puzzle. You have to fine-tune your bitrate for what you're showing on screen.
Low-Motion Content: If your stream is mostly just you talking, a podcast interview, or a slow-paced strategy game, you can comfortably stick to the lower end of the recommended range. Since not much is changing from one frame to the next, the encoder doesn't need as much data to work with.
High-Motion Content: On the other hand, if you're streaming action games, live sports, or anything with a ton of fast movement, you’ll want to push your bitrate to the higher end of the range. Giving the encoder more data is the only way it can keep up and render all that complex motion clearly, instead of dissolving into a blocky mess.
Think about it this way: two creators could be streaming at 1080p 60fps but have completely different bitrate needs. An artist doing a digital painting tutorial might get a clean picture well below the recommended value. A gamer playing a fast first-person shooter will need the full recommended bitrate, or more, to keep the image sharp.
Setting Your Bitrate for Twitch, YouTube, and Beyond
Figuring out the right bitrate isn't just a technical detail—it’s about playing by the rules of whatever platform you're on. While the general advice is a great starting point, platforms like Twitch, YouTube, and Facebook Gaming each have their own infrastructure and, more importantly, their own limits.
Getting this right is crucial for a stable, high-quality stream that doesn't just look good on your end but works for your viewers, too. What works on one platform might get you a choppy, unstable stream on another. That’s because these services use "ingestion servers" to grab your stream, and if you send more data than they're expecting, things can get messy. This is why you always have to tweak your encoder settings for the specific platform you're broadcasting to.
Twitch Bitrate Recommendations
Twitch is built mainly for live gaming, and its guidelines reflect that. For just about everyone who isn’t a top-tier Partner, Twitch recommends a maximum video bitrate of 6,000 kbps. You might be able to push it higher, but straying too far past this soft cap is asking for trouble, especially when it comes to transcoding.
Transcoding is what allows Twitch to create lower-quality versions of your stream on the fly, so viewers with slower internet can still watch. If you're not a Partner, you're not guaranteed to get transcoding. That means if you stream at a high bitrate, anyone with a slower connection is going to be staring at a buffering wheel.
Here’s a quick cheat sheet for streaming to Twitch using the H.264 codec:
- 1080p at 60fps: 6,000 kbps
- 1080p at 30fps: 4,500 kbps
- 720p at 60fps: 4,500 kbps
- 720p at 30fps: 3,000 kbps
For your audio, Twitch suggests keeping it at a maximum of 160 kbps. This is more than enough for crisp, clear sound without hogging your bandwidth.
YouTube Live Bitrate Guidelines
YouTube accepts higher bitrates than Twitch, up to 4K. YouTube transcodes live streams into lower-quality versions, so viewers on slower connections can still watch when you stream at a high bitrate.
If you use the standard H.264 codec, YouTube recommends a single bitrate for each resolution and frame rate. And if you're curious about the tech that sends your stream from your computer to their servers, our guide on what RTMP is breaks down the protocol that makes it all work.
Here’s what YouTube recommends for H.264:
- 1080p at 60fps: 12 Mbps (12,000 kbps)
- 1080p at 30fps: 10 Mbps (10,000 kbps)
- 720p at 60fps: 6 Mbps (6,000 kbps)
- 720p at 30fps: 4 Mbps (4,000 kbps)
For audio, YouTube recommends AAC or MP3 at 128 kbps for stereo, at 44.1 kHz. Music channels often use a higher audio bitrate.
This chart compares the bitrate that different codecs need for a 1080p stream.
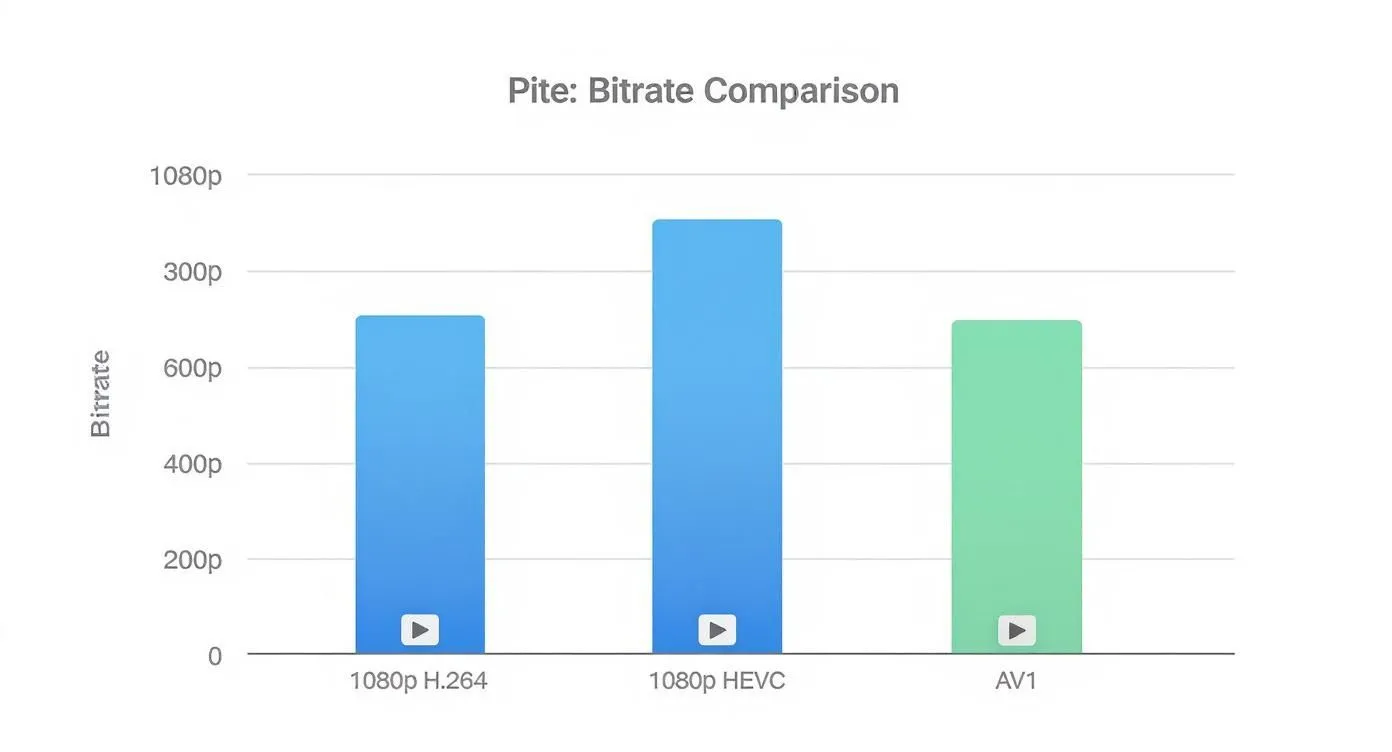
HEVC and AV1 need less bandwidth for the same quality, if your platform and hardware support them.
Facebook Gaming Bitrate Settings
Facebook has historically accepted lower bitrates than YouTube, and its live video specifications have changed several times. Check Meta's current live video specifications before you set your encoder.
Some streamers push past a platform's limits, but the safest choice is to stay within the official numbers.
In the end, the right bitrate it follows your platform's rules, it doesn't max out your own upload speed, and it gives your viewers a clean, smooth picture. Always start with the recommended settings and do a quick test stream. It's the only way to be sure everything looks and sounds exactly how you want it to.
Matching Your Bitrate to Your Upload Speed
You can have the most powerful computer and the fanciest camera, but none of that matters if your internet can't keep up. The single most important number for a stable stream is your upload speed. It's the biggest bottleneck streamers face, and getting it wrong is the number one cause of dropped frames, buffering, and frustrating lag.
When your internet provider advertises a "500 Mbps" plan, they're talking about your download speed. For streaming, that number is almost irrelevant. What you care about is your upload speed—how much data you can consistently push out to services like YouTube or Twitch. It's often just a tiny fraction of your download rate.
How to Find Your Real Upload Speed
Before you can even think about picking a bitrate, you need a realistic picture of what your connection can actually handle. A single speed test won't cut it, because internet speeds are rarely constant.
Here’s how to get a number you can trust:
- Use a Reliable Tool: Head to a trusted site like Speedtest.net or just Google "internet speed test."
- Go Wired: Ditch the Wi-Fi. Plug your computer directly into your router with an Ethernet cable for the most accurate and stable reading.
- Test at Different Times: Run tests in the morning, afternoon, and evening. You need to see how your speed holds up when everyone in your neighborhood is online.
- Find Your Baseline: Look at all your results and find the lowest upload speed you recorded. That's the number you should build your stream around.
This approach shows you your network's performance at its worst, which is exactly what you need to plan for a stable, professional broadcast.
The Headroom Rule for Stream Stability
Once you have your baseline upload speed, resist the urge to use all of it. Never set your bitrate to the maximum your connection can handle. Think of your internet connection like a highway—if you use every single lane, one small slowdown will cause a massive traffic jam.
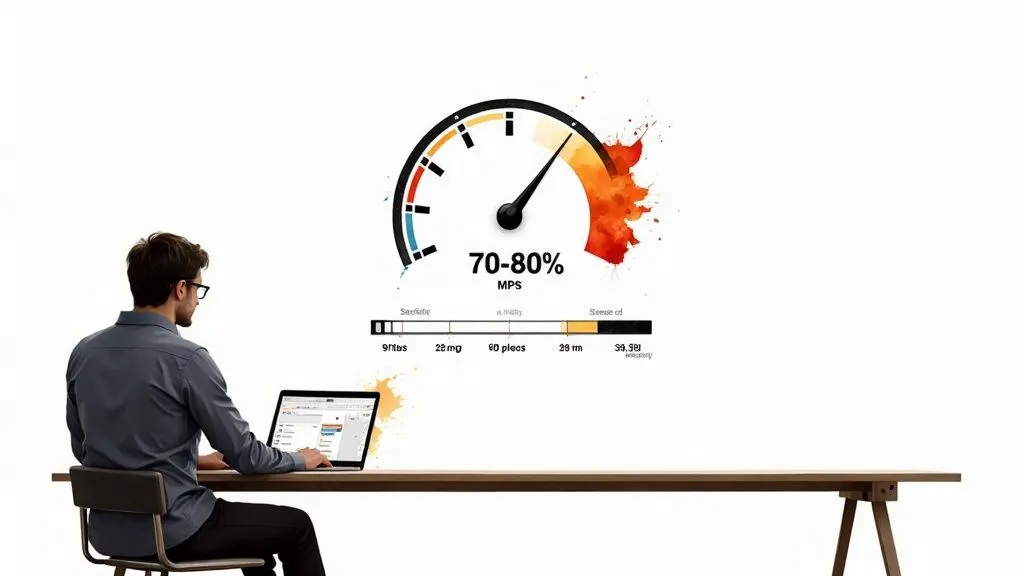
A common rule of thumb is the "headroom rule": keep your total stream bitrate (video + audio) at no more than about three quarters of your reliable upload speed. The rest is your safety net. It absorbs the natural dips and spikes in your connection without wrecking your stream.
Let's say your tests show a reliable upload speed of 10 Mbps (which is 10,000 kbps). To be safe, your total bitrate should stay between 7,500 and 8,000 kbps. This buffer gives your stream the breathing room it needs to stay smooth, even when your internet connection dips. Following this rule is all about prioritizing a stable, watchable experience for your audience.
Choosing a Stable Bitrate for 24/7 Streams
When you're streaming around the clock, the typical advice on bitrates needs a second look. For things like public webcams, relaxing nature scenes, or non-stop music channels, stability is far more important than peak visual quality. Your main goal is simply to stay live, not to show off the highest resolution your camera can handle.
Think about it: a two-hour gaming stream can handle a few dropped frames from a momentary internet dip. But for a broadcast that runs for weeks or months, those same tiny fluctuations can completely derail the stream and force a restart. That’s why a conservative bitrate makes sense for long-term broadcasting.
Prioritizing Consistency with CBR
For a 24/7 stream, use Constant Bitrate (CBR) in your encoder. YouTube recommends CBR for live streams. While a Variable Bitrate (VBR) is fantastic for saving space on recorded videos, CBR is the only real choice for live, always-on content. It sends a predictable, steady amount of data, which prevents the sudden spikes that can overwhelm your internet connection or the streaming platform’s servers over time.
If you stream from home, the stream uses your upload connection 24 hours a day. A cloud service such as 247 LiveStream streams at 1080p 30 FPS from cloud servers instead, so it does not use your home connection at all.
Finding Your 24/7 Sweet Spot
To choose a bitrate for an always-on stream from home, start from your lowest measured upload speed, not from the platform maximum.
- Select a Conservative Bitrate: YouTube recommends 10 Mbps for 1080p30 with H.264. If your upload cannot carry that with headroom, lower the bitrate or stream 720p at 30 fps, where YouTube recommends 4 Mbps. Static or slow content, such as a music stream with a still image, often looks clean below the recommended value.
- Maintain Ample Headroom: Keep your stream well under your lowest upload result, as the headroom rule above describes.
- Monitor and Adjust: Let the stream run for a full day. If everything looks stable, you can try bumping the bitrate up in small steps, but only if you really need to.
This method helps your broadcast survive the small network dips that happen over a long period.
By putting stability first, you can create the kind of compelling, always-on content that keeps viewers coming back. If you need some inspiration, check out our guide on evergreen streaming ideas that suit a 24/7 broadcast.
Your Bitrate Questions, Answered
Getting your settings dialed in is a great first step, but real-world streaming always throws a few curveballs. Let's tackle some of the most frequent questions that pop up.
Use this as a quick reference.
What’s the Deal with VBR vs. CBR?
You'll see these two settings in your encoder, and picking the right one is absolutely critical for live streaming. They control how your data is sent out.
- CBR (Constant Bitrate) sends data at a completely steady rate. It’s a predictable, even flow, which is exactly what live platforms need. This is the right choice for live content, and it's what services like Twitch and YouTube recommend.
- VBR (Variable Bitrate) is more of a wild card. It pushes more data during fast-action scenes and less during quiet moments. While this is fantastic for optimizing file sizes on a video you're just recording to your hard drive, it's a nightmare for live streaming. The unpredictable spikes can easily lead to buffering for your viewers.
For anything live, always choose CBR. It’s the key to providing a smooth, reliable viewing experience that won't drop frames or stutter.
Why Is My Stream Lagging When My Internet Is Super Fast?
This is a classic—and maddening—problem. You've got blazing-fast internet, but your stream is still a stuttering mess. Often, the cause isn't your internet; it's an overloaded encoder.
Your computer's hardware (your CPU or GPU) has to work incredibly hard to compress and send out your video in real-time. If you set your bitrate too high for your machine to handle, it simply can't keep up. The result is skipped frames and what looks like lag, even with all the bandwidth in the world.
The fix? Try lowering your bitrate a little at a time. You can also try a faster encoder preset in your software, like switching from the "Quality" to the "Performance" setting in OBS.
Does Higher Audio Bitrate Actually Make a Difference?
Oh, absolutely. For anyone listening with a decent pair of headphones, a higher audio bitrate such as 320 kbps can sound fuller than 128–160 kbps, especially for music.
Now, if you're just chatting or playing a game, 160–192 kbps is often good enough and saves you a tiny bit of bandwidth. But if music, sound design, or creating a specific atmosphere is a big part of your stream, pushing for 320 kbps is a simple way to improve the experience for your audience.
Want an always-on stream that does not depend on your home PC or upload speed? 247 LiveStream streams your pre-recorded videos 24/7 from cloud servers at 1080p 30 FPS, and reconnects automatically if the connection to YouTube drops. It costs $16 per month, or $14 per month billed yearly. See how it works at https://247livestream.live.