Ever found yourself scrambling to catch a live webinar, only to miss the most important part? Or maybe you wanted to rewatch an epic gaming stream that the creator never saved. It happens all the time. Learning how to record a YouTube live stream is a game-changer, whether you're a creator building an archive or a viewer who wants to save a gem before it disappears.
Why Bother Saving a YouTube Live Stream?

The reasons for recording a stream go way beyond just catching up. For a creator, a live broadcast is a treasure trove of content waiting to be repurposed. For a viewer, it’s a way to hang on to unique, one-off events for offline viewing or later study.
For Content Creators
Saving your own streams opens up so many doors. Instead of letting all that hard work just vanish into the ether, you can turn a single broadcast into a month's worth of content.
Think about it. You can snip out the best moments for a highlight reel, create short, punchy clips for TikTok and Instagram, or pull out a great Q&A segment and turn it into its own tutorial video.
By archiving your live sessions, you build a permanent, searchable library of content that continues to attract new viewers and adds long-term value to your channel. This approach is key to maximizing your reach.
And it's not just about video. Saving your stream makes it easy to do things like getting a transcript from a YouTube video, which is fantastic for accessibility and boosting your SEO.
For Viewers
As a viewer, your reasons are just as important. A lot of incredible content—educational workshops, exclusive interviews, live concerts—is temporary. Recording it gives you a personal copy you can refer back to, without worrying about the creator deleting it or setting it to private. This is a lifesaver for complex tutorials you want to follow at your own pace, especially if you're offline.
There's no denying how central streaming has become. Back in May 2025, streaming platforms accounted for 44.8% of all TV viewing in the U.S. YouTube alone captured a massive 12.5% share of that time. These numbers show just how much we rely on live content, making the ability to save it more valuable than ever.
Using YouTube’s Built-In Archive Feature
If you're a creator, the easiest way to save your live stream is right inside YouTube itself. The platform has a handy built-in feature that automatically archives your broadcast as a regular video on your channel the moment you end the stream.
Think of it as the ultimate "set it and forget it" option. Before you go live, you just need to make sure this setting is enabled. Once your stream is over, YouTube does the heavy lifting, converting your live session into a Video on Demand (VOD) that pops up right in your content library. No extra software or fancy hardware needed.
Choosing the Right Privacy Setting
The best part? You're in complete control of who sees the recording. Once the stream is archived, you can pick the perfect privacy setting for your needs.
- Public: This makes your recording visible to everyone. It’ll show up on your channel, in search results, and in your subscribers' feeds, which is great for getting the most eyes on it after the event.
- Unlisted: Want to share it with a select group? Unlisted is the way to go. The video won't appear publicly, but anyone with the direct link can watch it. It's perfect for things like private webinar replays or sharing with a Patreon community.
- Private: This is your most secure option. Only you and specific people you invite with their Google accounts can view the video. I often use this for internal team reviews or if I plan to download and edit the footage before a polished, public release.
This flexibility lets you adapt on the fly. You can go live, have it recorded automatically, and then figure out your sharing strategy later.
Understanding the Limitations
Now, while this built-in archive is incredibly convenient, it isn't perfect. The biggest catch is video quality. If you're streaming in pristine 4K or even 8K, YouTube's archive might not save it at that full resolution. Often, streams broadcast above 1440p (Quad HD) are processed and stored at a lower quality, usually capped at 1440p.
Here’s a quick peek at the default setting you’ll find in your YouTube Studio.
This screenshot shows the default setting, which automatically archives streams under 12 hours. For most creators, this is fantastic. But if preserving that razor-sharp 4K footage is non-negotiable for you, you'll want to record a local copy at the same time.
These limitations make sense when you consider the sheer scale of live streaming. With a global audience for gaming streams alone expected to reach 1.4 billion by 2025, platforms have to strike a balance between quality and manageable data storage. As the giant in the space, capturing an estimated 52% of viewers, YouTube’s rules are built for reliability across the board. You can discover more insights about live streaming statistics to see just how big this world is.
If you need a flawless, full-resolution copy of your broadcast for high-end editing or repurposing, you can't rely solely on the YouTube archive. That's when combining it with a local recording becomes a pro-level move.
Recording Locally with OBS and Other Software
Sometimes, you need a perfect, high-quality copy of a stream. Maybe it's your own broadcast, or maybe it's someone else's event you need to archive. In these cases, recording locally is the best way to go.
Powerful and free tools like OBS Studio give you total control over the final video file. You get to dictate everything—the resolution, frame rate, audio quality, and file format. The entire recording happens directly on your computer's hard drive, completely sidestepping YouTube's compression or any potential platform limitations.
This is how you get a true "master copy" that’s identical to what was originally broadcast. It's a non-negotiable step for anyone serious about professional editing, creating slick highlight reels, or just keeping a flawless version of an important event.
This infographic breaks down the simple process creators can use to have YouTube automatically save their streams, which is a great backup but doesn't offer the same control as a local recording.
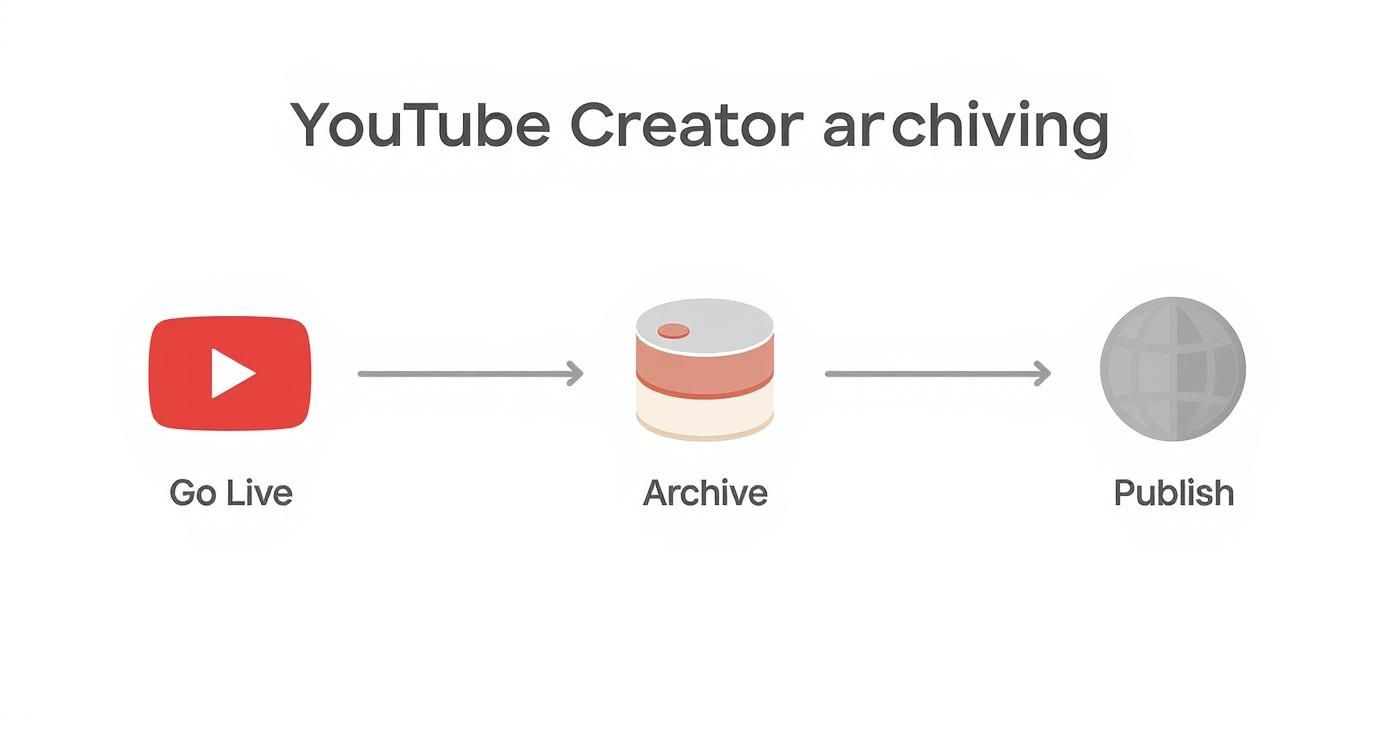
While YouTube's auto-archive is convenient, dedicated software is what you need for quality and flexibility when it comes to repurposing your content.
Getting OBS Set Up to Capture a Stream
There's a reason Open Broadcaster Software (OBS) is a favorite in the streaming community. It’s free, endlessly customizable, and surprisingly light on computer resources.
Getting started is pretty simple. First, in the main OBS window, you'll add a "Browser" source. This is where you'll paste the URL of the YouTube live stream you want to capture.
Once the stream pops up in your OBS preview window, it's time to dial in your recording settings. This is the most important part. Head over to File > Settings > Output and change the "Output Mode" to "Advanced." This is where the real power is.
Here's what you need to configure for the best results:
- Recording Format: Always, always choose MKV. I can't stress this enough. If your computer crashes or the power goes out, an MP4 file will be completely corrupted. Gone. An MKV file, however, will be perfectly fine up to the moment of interruption. You can easily convert it to MP4 in seconds using OBS's built-in remux tool (File > Remux Recordings).
- Encoder: Your choice here depends on your graphics card. If you have a modern NVIDIA card, pick NVENC (H.264). For AMD users, look for AMF. These options use your GPU to do the heavy lifting, which is far more efficient and won't bog down your CPU like the software-based x264 encoder will.
- Bitrate: This setting controls the quality and file size. For a sharp 1080p recording at 60 frames per second, a bitrate between 8,000 and 12,000 Kbps is the sweet spot. If you're capturing in 4K, you'll want to push that up to 30,000 Kbps or more.
My Pro Tip: Before you commit to a multi-hour recording, do a quick 30-second test. Hit record, let it run for a bit, then stop and check the file. Make sure the video is smooth and the audio is clear. This simple check has saved me from hours of frustration more times than I can count.
Local Recording Software Comparison
While OBS is fantastic, different tools click with different people. Let's look at a few of the most popular free options side-by-side.
| Software | Best For | Key Features | Learning Curve |
|---|---|---|---|
| OBS Studio | Power users and those who want total customization without spending a dime. | Highly customizable scenes, extensive plugin support, low resource usage. | Moderate to Steep |
| Streamlabs Desktop | New streamers looking for an all-in-one, user-friendly experience. | Built on OBS with a simpler interface, integrated themes, and alert widgets. | Beginner-Friendly |
| NVIDIA ShadowPlay | Gamers with NVIDIA GPUs who want a simple, low-impact recording solution. | Minimal performance impact, "Instant Replay" feature to save past gameplay. | Very Easy |
Each of these tools can get the job done, but the one you choose will depend on how much control you want versus how much time you want to spend on setup.
A Few Alternatives to OBS Studio
While OBS is the top dog for many, it's definitely not the only game in town. Other tools offer different workflows that might just be a better fit for you.
Streamlabs Desktop is built on the same core as OBS but wraps it in a much friendlier package with built-in themes, alerts, and other goodies. It's a great starting point for streamers who feel a bit overwhelmed by OBS's raw interface. On the premium side, XSplit Broadcaster is a powerful option known for its rock-solid stability and professional features, though it does require a subscription. For a deep dive into even more options, check out our guide on the best software for YouTube live streaming.
No matter which software you land on, the core idea is the same: you're capturing the video feed directly and encoding it on your own machine. This leaves you with a permanent, high-fidelity asset that's completely yours, ready for whatever you have planned.
Using Cloud and Browser-Based Recording Tools
What if your computer isn't quite beefy enough to run OBS and record locally? Or maybe you need to grab a stream but you won't be anywhere near your desk when it goes live. This is exactly where cloud and browser-based services come into play. They offer a completely different way to record a YouTube live stream without bogging down your own machine.
The whole process is incredibly straightforward. Instead of installing and configuring software, you simply paste the stream’s URL into the service. From there, their powerful servers take over, connecting to the stream and doing all the heavy lifting. Your PC is completely out of the loop, which means your CPU, GPU, and hard drive are free for whatever else you need to do.
It’s the perfect “set-it-and-forget-it” solution. You can schedule a recording ahead of time and just let it run, knowing the service will capture everything for you, whether you’re at home or on the go.
Comparing Popular Cloud Recording Options
There are quite a few platforms that specialize in this kind of remote recording, each with its own quirks and features. Most of them run on a freemium model—you get a basic service for free, with paid plans that unlock more powerful tools.
When you're shopping around, here are a few things to keep an eye on:
- Recording Limits: Free plans almost always have a catch. You might be limited to an hour per recording or only get a certain number of captures per month.
- Watermarks: This is a big one. To nudge you toward a paid plan, many free tools will slap their logo right onto your final video.
- Resolution Caps: While some services can snag streams in crisp 1080p or even 4K, the free versions are often stuck at 720p.
- Storage and Access: Your recordings live in the cloud, not on your hard drive. Check how long the files are kept and what the download process looks like.
Choosing a cloud service is a trade-off between convenience and control. You give up the granular quality settings you get with OBS, but you gain the freedom to record from anywhere, on just about any device.
When to Use Cloud Recording
The convenience factor is a huge deal, especially when you consider how much content is streamed live. In the second quarter of 2025 alone, people watched an incredible 14.83 billion hours of YouTube Live content, peaking at 18.94 million concurrent viewers. With that much happening all the time, a remote solution can be a lifesaver. You can read more about the global livestreaming landscape on streamscharts.com.
Cloud-based tools are a fantastic fit for a few common situations. If you're working with an older computer that chugs along with intensive tasks, offloading the recording work to a powerful server makes a world of difference. They’re also perfect for capturing long events—think charity streams or multi-day conferences—where you can't be glued to your screen the whole time.
And finally, if you just need to grab a stream quickly without installing anything, browser-based tools are the absolute fastest way to get the job done.
Managing Your Recordings and Staying Compliant
So, you’ve recorded the stream. Great! But the job isn't quite done. Now you're left with a massive video file, and that presents two big hurdles: what to do with the file itself, and what you're legally allowed to do with it.
Let's be realistic about file sizes. A three-hour stream recorded in crisp 1080p can easily be a 30-40 GB monster. A few of those, and your computer's hard drive will be begging for mercy. You need a game plan.
Smart Storage and Compression
The first thing I usually do is compress the file. You can use a fantastic, free tool like HandBrake to shrink your video's size without a noticeable hit to the quality. For instance, I've taken a 40 GB raw recording from OBS and squished it down to a much friendlier 8-10 GB MP4. That's a huge difference when you're trying to build an archive.
Once it's a manageable size, where do you put it?
- External Hard Drives: This is the go-to, budget-friendly option. Grabbing a dedicated 4TB external drive gives you a ton of breathing room for future recordings.
- Cloud Storage: Services like Google Drive or Dropbox are perfect if you need to access your files from different devices. Just keep an eye on those monthly fees and be prepared for some long upload times.
- Network Attached Storage (NAS): If you're serious about creating a long-term library, a NAS is like having your own private cloud at home. It offers huge storage capacities and lightning-fast access on your local network.
Getting your files compressed and stored safely means your hard work is protected and organized. Once your recording is secure, you can think about other ways to use it. For example, learning how to transcribe YouTube videos is a brilliant way to turn your stream's audio into blog posts, detailed show notes, or captions for accessibility.
Navigating Copyright and Fair Use
Okay, this is where you need to pay close attention, especially if you're recording someone else's stream. Just because technology lets you record something doesn't automatically give you the right to share it.
YouTube's rules and general copyright law are crystal clear: you cannot re-upload someone else's content without their permission. Period. Trying to do so is the fastest way to get a copyright strike, which could get your video removed or even get your entire channel shut down.
Fair Use is a legal doctrine that sometimes permits using copyrighted material for things like commentary, criticism, or news reporting. But—and this is a big but—it's a very gray area and is used as a legal defense, not a free pass. It’s not a shield you can just hide behind.
If you're just recording a stream for your own private use, like saving a webinar to re-watch later, you're almost always in the clear. The problems pop up the second you click "publish." Giving credit to the original creator is a nice gesture, but it won't protect you from a DMCA takedown notice if the owner decides to file one.
And for creators saving their own streams, you'll want that VOD to look its best. Taking a moment to optimize video for YouTube can make a huge difference in how it performs after the live event is over.
When it comes down to it, the golden rule is simple: be smart and respectful. Only publish content you made yourself or have clear permission to use.
Common Questions About Recording Streams
Even with the best tools, you're bound to hit a few snags when you start recording YouTube live streams. Let's walk through some of the most common headaches and how to solve them so you can get back to capturing great content.
One of the biggest questions I hear is, "Can I record a stream that's already over?" Unfortunately, the answer is usually no. If the creator didn't have YouTube’s auto-archive feature turned on and you weren't recording it live, that content is likely gone forever. This is exactly why having your recording setup ready to go before the stream begins is so critical.
Another common complaint is ending up with a choppy or pixelated recording. This is almost always a problem on your end, not with the stream itself. If you're using software like OBS, your computer's CPU or GPU is probably overloaded. A quick fix is to lower your recording settings—try dropping from 4K to 1080p or dialing back the frame rate from 60 to 30 FPS. That should take some pressure off your system.
Fixing Audio and Sync Problems
What about when the video looks perfect but the audio is completely missing or out of sync? It's an incredibly frustrating issue, especially when you've got a more complex recording setup.
First things first, dive into your audio sources in OBS or whatever software you're using. Double-check that you've actually selected the correct desktop audio device. You'd be surprised how often it's something simple, like the audio mixer levels being accidentally muted. Sometimes, a good old-fashioned computer restart can clear up a driver issue that's causing the audio to fail.
If the sound is there but it’s trailing behind the video, you’ve got a sync problem. This often happens when your machine can't quite keep up with encoding both the video and audio streams in real-time, causing them to drift apart. While creators can sometimes fix this in post-production, it's a real pain. To get to the bottom of this specific issue, check out our guide on how to fix instances of YouTube audio being out of sync.
Is It Legal to Record Someone Else's Stream?
This is the big one. Just because you can record something doesn't always mean you should. The legality really boils down to what you plan to do with the footage after you've saved it.
Key Takeaway: Recording a stream for your own private, personal use—like watching a tutorial offline or saving a live event you can't attend—is generally fine. The line is crossed when you re-upload, share, or distribute that content without getting permission from the original creator. That's a copyright violation, plain and simple, and it can result in a DMCA takedown notice or a strike against your own channel. Always respect the creator's work.
For creators looking to keep their channel active and engaging around the clock, 24/7 LiveStream provides a simple, powerful solution. Our cloud service lets you loop your pre-recorded videos into a seamless, professional-looking live stream. It's the perfect way to grow your audience and boost your channel's watch time. Visit https://247livestream.live to see how you can keep your channel live, 24/7.